PART II: FINDING THE TARGET
In a previous post we learned the basics of L-rod dowsing. https://www.truetreasurebooks.net/dowsing-for-detectorists-part-1-the-l-rod Now we are going to put your new skills to practical use in improving the quantity and quality of your detecting finds. Firstly though, many of you probably want to know how to both dowse and recover targets by yourself. There are at least two good options:
1. Dowse and mark first, detect and dig second. You will need a couple of dozen two foot long pea sticks from a garden centre and something in which to carry them on your back or hip. I use an archery quiver but I am sure most of you could make or adapt something for carrying the sticks if you wanted to save about £20. All you do then is dowse and mark where the rods cross by pushing a stick into the ground. When you run out of sticks, set your detector up and detect from stick to stick, collecting the sticks as you go, as well as the finds.
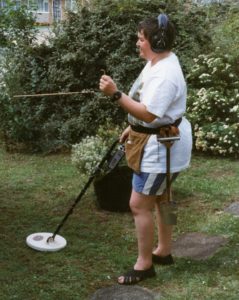
2. You can dowse with just one rod, believe it or not. The great advantage with single rod dowsing is that you have one hand free to use your detector, so you can both dowse and detect simultaneously. All you have to do is to use your detector as normal and hold the rod in your other hand. To recover what you detect you only have to find a means of carrying your digger, without using your hands. A toolbelt works fine or there are specialist hooks and spade carriers. https://www.truetreasurebooks.net/hands-free-carrying
While we are on the subject of recovery, I ought to mention some of the pitfalls. Your metal detector will not be able to detect every target that you dowse. Dowsing goes far deeper than metal detectors. I have heard of match head sized silver objects, dowsed at depths of three feet and I have dowsed targets that only produced a signal after much soil was removed from the surface. You can, of course, just dig a hole wherever your rods indicate a target but, unless you are looking for something specific like a suspected hoard, you are likely to find this approach counter productive. It could take a couple of hours to dig each hole. I use a large coil fitted to my detector; if a search for a target doesn’t produce a signal from my detector, I just leave it and go on to the next target. I couldn’t have made the find had I only used my detector anyway.
Recently disturbed ground can be quite frustrating to dowse owing to a phenomenon called remanence. When an object is removed from the ground, dowsing rods still react to the spot where it lay for about a fortnight, in my experience. Conversely, when an object is placed in the ground it takes a similar amount of time before rods will react to it. Beware freshly ploughed fields, detecting rallies and the dry sands of beaches in Summer!
So far as search techniques are concerned there are several approaches depending on the type of site and your temperament.
- Theoretically you should be able to just follow the rods or rod from one good target to the next, by moving your body to keep your forearm(s) in line with the rod(s). This is probably the easiest way and it is excellent for checking out a field for the first time. However, unless you are really good at discriminating you will miss a lot of good targets.
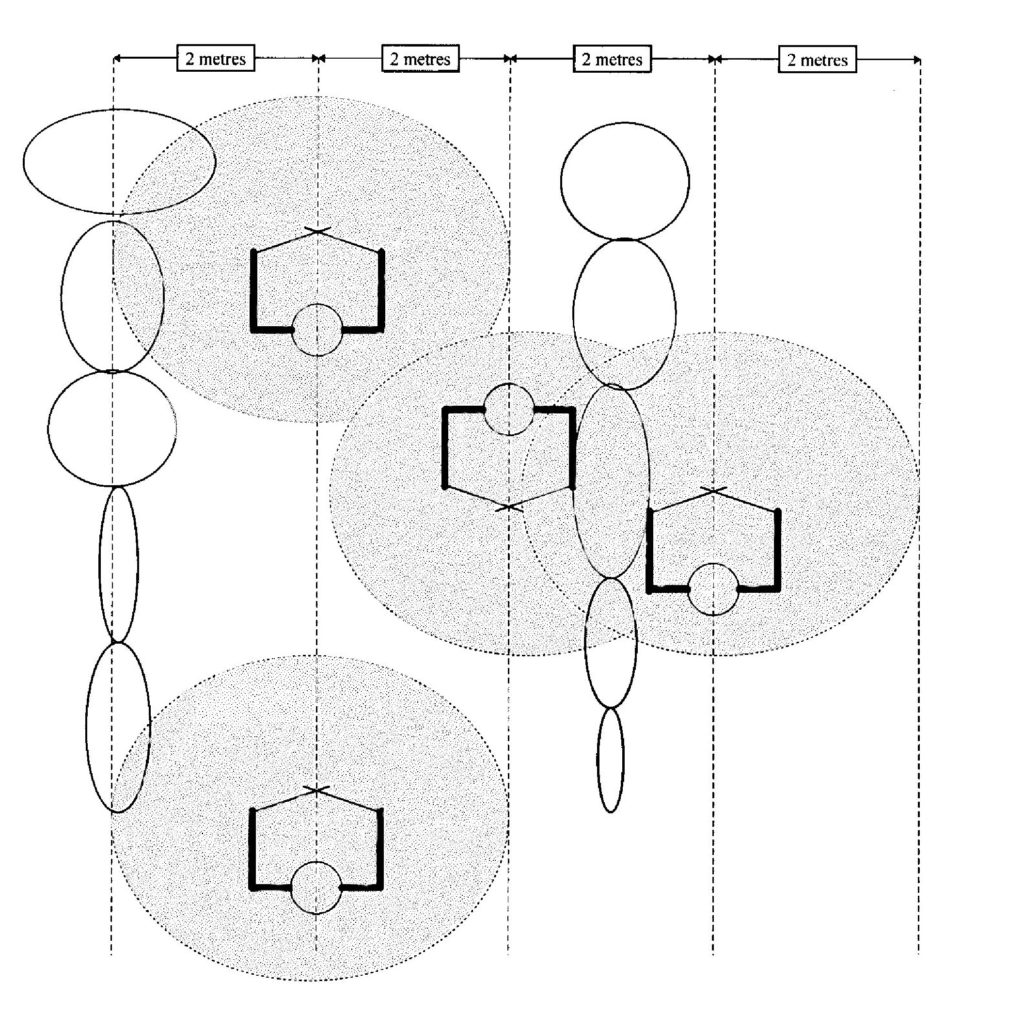
- There is a more systematic approach for dowsing with two rods and one that is almost essential for searching sites like orchards or woodland, where you are unable to walk around unrestricted. Search in straight lines about two metres apart; the rods will cross if you walk over a target or there is a target to the left or right of you. Just put a stick in the ground at your feet whenever the rods cross. When you come to look for the target you should detect a circle around your marker at least twice the width between your search lines. Thus your detecting area should be four metres diameter if your search lines are two metres apart. It may help if you imagine the rods to be a detector fitted with a 4 metre search coil, whenever you get a signal (the rods cross) you mark the spot. Later you return with your conventional detector to pinpoint and dig up the target(s). If you are searching an orchard, there is no need to fight your way through the trees trying to detect for targets which you suspect lie in the next row. You can deal with such targets when you come to search that row. If you are searching open land it will help to define your detecting areas if you leave your markers in place until you have finished recovering targets. You should then end up with lines of markers to detect to in place of the natural lines, formed by the trees in an orchard (Fig. 1).
- You can improve on this two rod method a little by making the initial target location a two-stage process. Every time your rods cross, restart the rods and ask them to point at the target. Then, when you push your marker stick into the ground, lean it in the direction indicated by the rods. That will halve the search area as you only need to detect on the left side or the right side of the marker, depending on which way it is leaning.
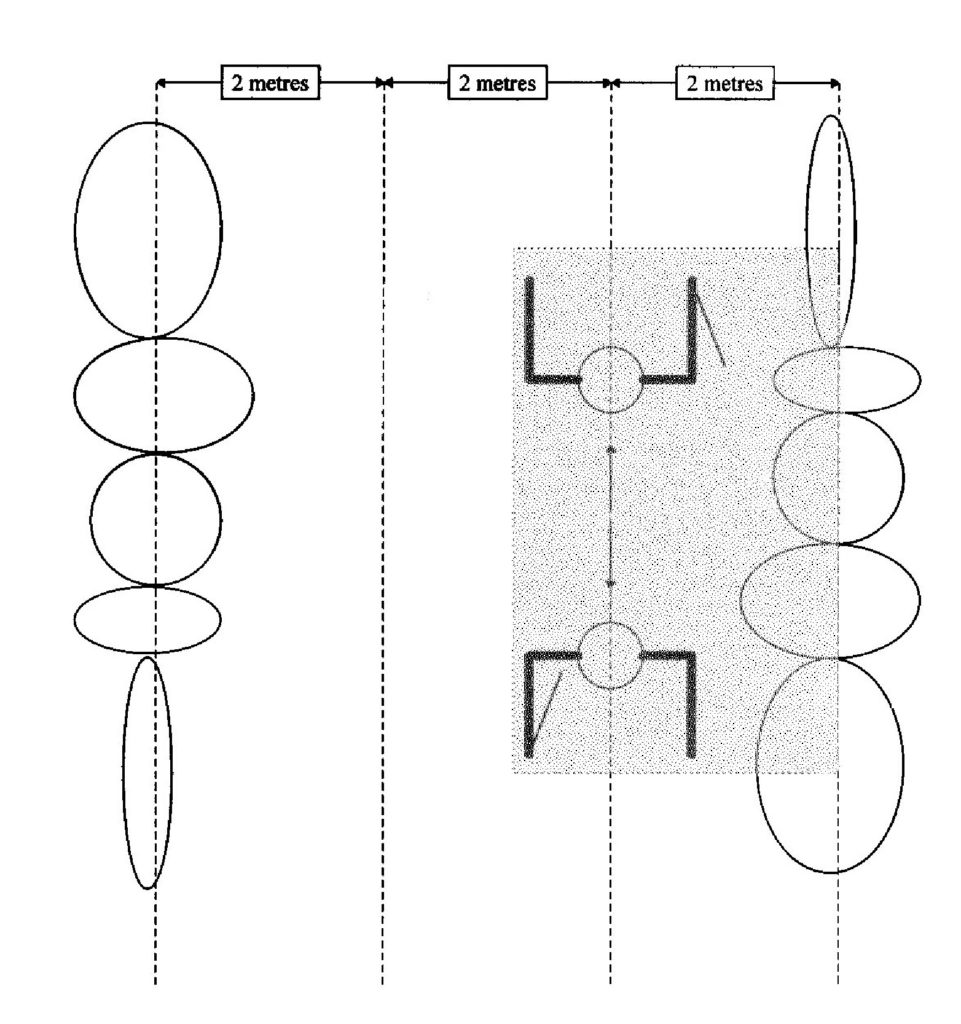
- I find systematic dowsing with a single rod easier since the rod will point at the target as its means of alerting you to the fact that there is a target. Automatically you are given a better indication of the target location and minimised detecting area. For orchards and the like, search in straight lines as with two rods; as you approach a target the rod will start to turn. Walk slowly on until the rod is just pointing behind you, by which time you will probably have lost control of it and it will be resting against your arm. Put a marker in at your feet, leaning it to the left if the rod turned left or to the right if the rod turned right. Walk forward a couple of paces so that you are well clear of the target, then turn yourself around 180 degrees so that you are facing the way you have just come. Restart the rod and retrace your steps slowly past your marker until the rod turns to point behind you once again. Place another marker leaning to the side the rod pointed. You should now have two markers, leaning in the same direction which, theoretically, form the two ends of the base line of a triangle with the target lying at the apex. There is no need to worry about the trigonometry. When you return with your detector, just search all the area between the two markers and from the markers out to the tree line. (Fig. 2).
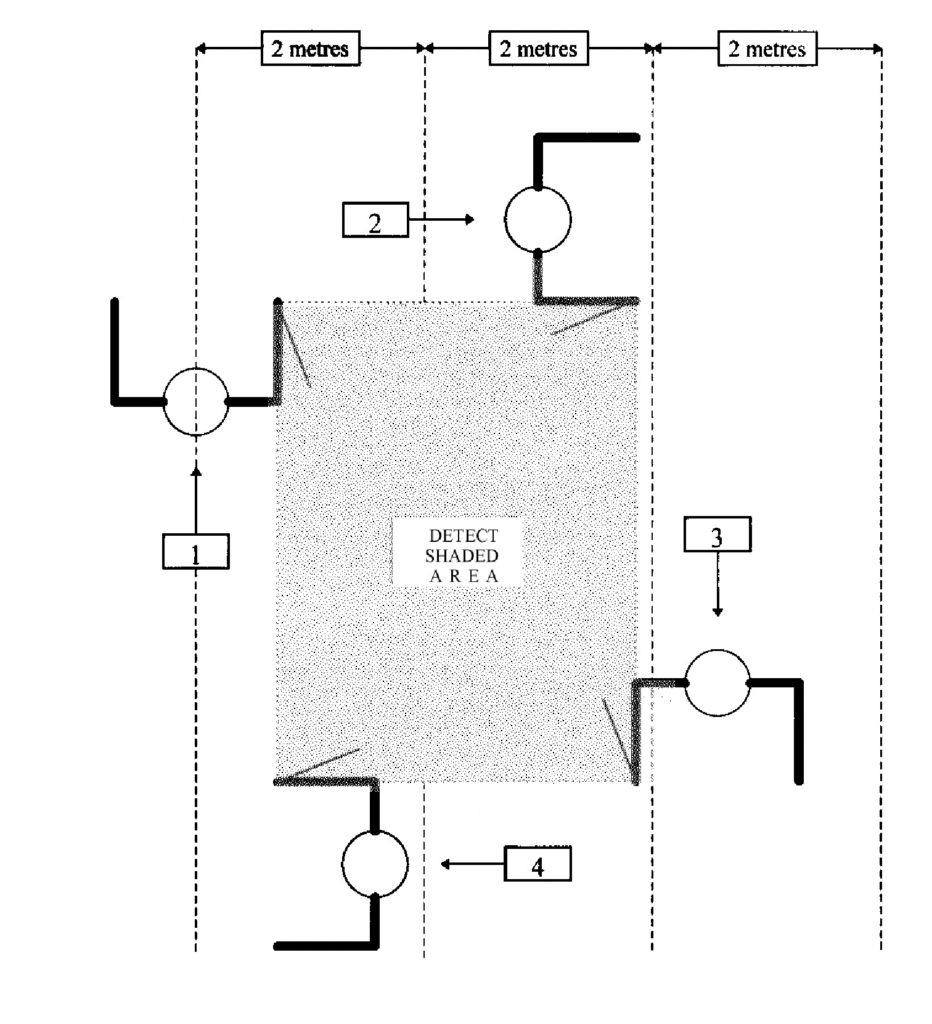
- For searching open land with a single rod you can use the “boxing” method. If you also carry your detector you only need half a dozen small marker sticks that you could carry in your finds pouch. Search in lines two metres apart as before. When the rod starts to turn, keep walking until the rod is pointing behind you (as in 4 above). Put down a marker, turn yourself 90 degrees in the direction that the rod pointed, back off two paces, restart the rod and walk slowly on until it turns again to the same side as previously. Put down another marker. Repeat the process twice more and you should then have four markers in the ground with each marker forming a corner of a square or box. Theoretically the target will lie at the centre of the box but detect the complete box in case there is more than one target. (Fig. 3).
An effect of multiple targets when using one rod is that after you’ve placed your first marker, your rod subsequently swings to the “wrong” side. When this happens, place a marker; restart the rod and continue walking until the rod swings to the “correct” side then place another marker. When you have finished marking the first target, you can go back to the “out of place” marker and dowse for the second target.
In conclusion, dowsing with L-rods may sound a bit complicated but it really is very simple and well worth the effort. Once you have mastered the technology you will find that you can search faster, deeper, more productively and in more difficult places than ever before. Good Luck.
For more information on Dowsing check out my book, Dowsing for Treasure:

Recent Comments